Create Your Pirate Crew with a One Piece Character Generator
Discover how to use a One Piece character generator to create authentic OCs in Eiichiro Oda's style. Turn your photos into pirate legends with our guide.
Ever thought about creating your own One Piece character? With the right AI tools, you can take your own photos and transform yourself into a pirate worthy of the Grand Line, all in Eiichiro Oda’s iconic art style. It's a fantastic way to cook up a custom avatar for your social media, a streaming channel, or just for the fun of it.
Set Sail on Your Grand Line Adventure
So, you want to see what you’d look like as a swashbuckling pirate in the world of One Piece? You've come to the right place. Think of this guide as your personal treasure map for using an AI art generator to turn your photos into characters that look like they jumped right off the pages of Oda's manga.
We're going way beyond just making a generic avatar here. This is all about crafting a genuine original character (OC) with their own personality, perfect for all sorts of creative outlets.
Who Is This Guide For?
This process is a game-changer for so many people. I’ve seen it work for:
- Streamers who want a unique, eye-catching persona that their audience will remember.
- Fanfiction writers who've been dying to finally see the original characters they've created.
- Role-players hunting for that perfect, custom avatar for their next D&D or forum campaign.
- Fans who, let's be honest, just want to imagine themselves joining the Straw Hat crew.
We’re going to walk through the entire journey, from picking the right photos to get the best results, to nailing that famous art style with clever prompting. The goal isn't just to make a cartoon version of yourself—it's to build a believable character that truly captures the adventurous spirit of the Grand Line.
My own journey started with just wanting a cool profile picture for a gaming forum. Before I knew it, I had created a whole pirate captain persona that I now use everywhere. It adds a layer of fun and identity that a simple selfie never could.
I'll break down the technical side into simple, practical steps, focusing more on the artistic choices you'll make along the way. We’ll get into the tiny details that make a character feel real, from their classic One Piece expression to their gear.
Alright, let's raise the Jolly Roger and bring your pirate dreams to life. Your adventure starts now, and by the end of this, you’ll have everything you need to create something truly your own.
Choose the Right Photos for Your Voyage
The real magic behind a great one piece character generator doesn't start with the prompt—it starts with the photos you feed it. Think of your source images as the clay for a sculpture. The better the clay, the more detailed and true-to-life your final character will be. High-quality input is the secret to getting high-quality output.
Your main job here is to give the AI a crystal-clear, unmistakable look at your facial features. That means you’ll want to stick with well-lit, high-resolution headshots where your face is front and center.
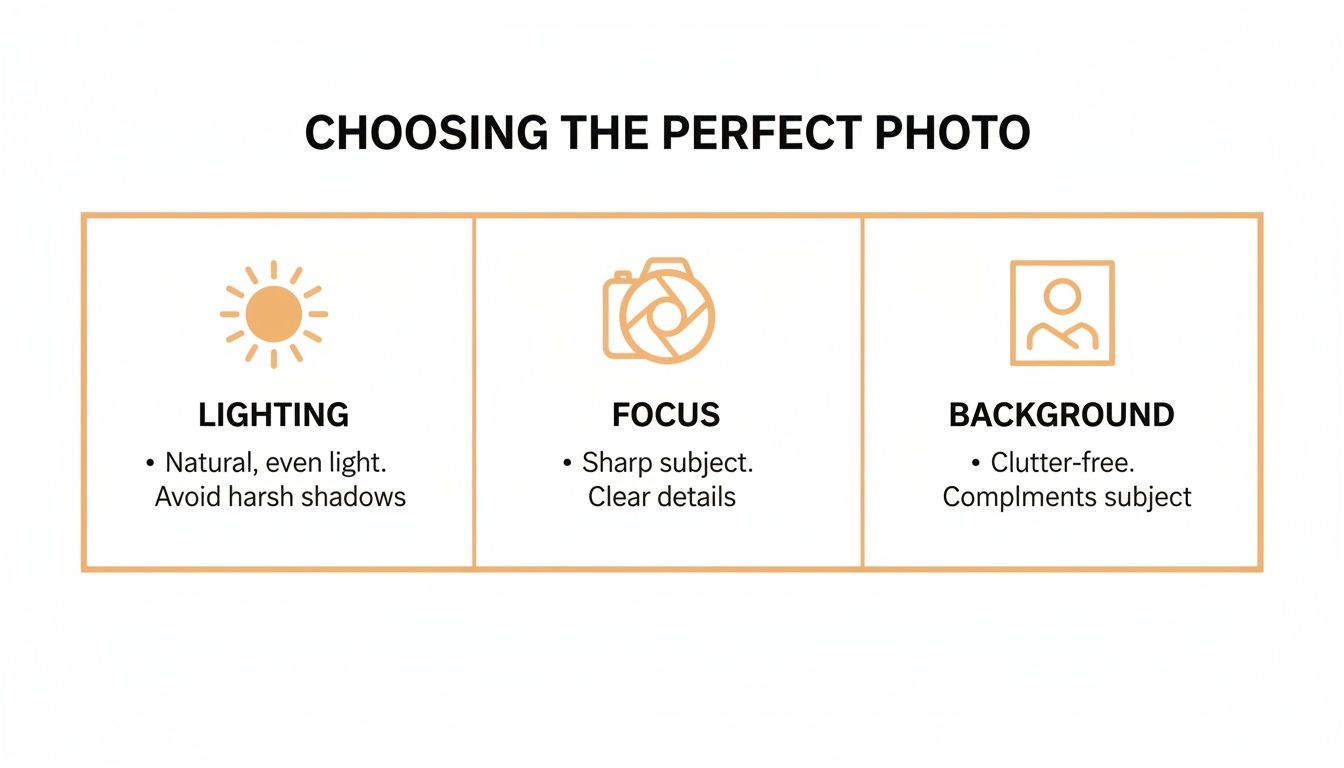
What Makes a Photo Perfect?
For the absolute best results, your photos need to check a few boxes. Steer clear of anything that hides your face, like heavy shadows, sunglasses, or a hat that covers your eyes. The AI has to see you clearly to have any hope of translating your features into Eiichiro Oda's iconic style.
I've found my phone’s portrait mode is a fantastic little hack for this. It automatically blurs the background and makes your face the focal point, which is exactly what we’re going for. A simple, neutral background, like a plain wall, is perfect because it keeps the AI from getting sidetracked by random stuff behind you.
Building a Character Model That Can Do It All
Don't stop at just one great picture. If you want a character that’s versatile and can show a range of emotions, you need to provide a collection of photos. I’ve found that a set of 10-20 images is the sweet spot.
Try to include a mix of these:
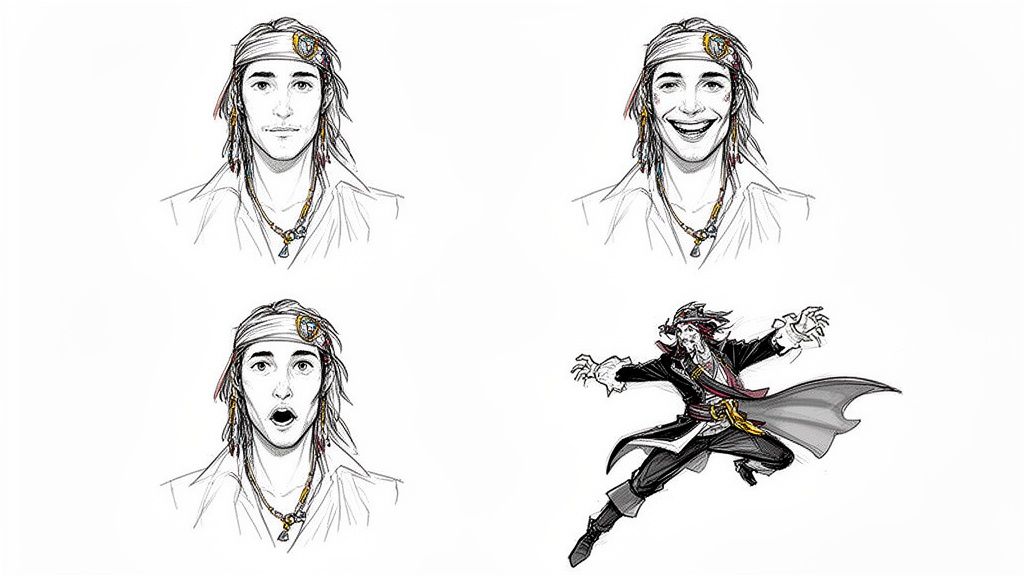
- Different Facial Expressions: Snap a few pictures of yourself smiling, looking serious, surprised, or even angry. This variety is what teaches the AI to draw your character with that classic, over-the-top One Piece emotional range.
- Various Angles: Make sure you have shots from the front, a few three-quarter views, and maybe a slight profile. This gives the AI a much better sense of the 3D structure of your face.
- Consistent Lighting: While you want your expressions to change, try to keep the lighting similar across all your photos. It just helps avoid confusing the AI.
Here's my pro-tip: Just take a new batch of photos for this. A quick ten-minute photoshoot in front of a window can give you the perfect set of images. It's a small effort that dramatically improves how much the final character actually looks like you.
And for all the cosplayers out there, this is where you can really go all out. Get clear shots of your costume's most important details—that unique design on a jacket, a signature accessory, or an intricate pattern. The AI will use these details to weave your specific cosplay right into the artwork.
For more tips on this, check out our guide on how to turn a photo into an illustration. Seriously, taking the time to put together a strong set of source images is the single most important thing you can do to make sure your journey into the Grand Line is a success.
2. Nailing the Iconic One Piece Art Style
Before you can get a one piece character generator to spit out something that looks right, you have to get a feel for what makes Eiichiro Oda's art so unique. It’s more than just slapping big eyes on a character; it’s about capturing that specific, wild energy that’s defined the series for over two decades. The AI is a powerful tool, but it needs you to be the art director.
What makes Oda's style so recognizable? It's all about the incredibly expressive features. Just think about the sheer variety of eye shapes you see in the series. You've got everything from Luffy's simple, determined dots to Mihawk's piercing, hawk-like gaze. Mouths are just as crucial—they stretch into impossibly wide grins and contort into dramatic grimaces, pushing emotion in a way that is pure One Piece.
This is where your input really matters. A generator might have a generic "One Piece Style" button, but it's your text prompts that will breathe life and authenticity into the final image. You've got to be the one to specify these details to get a character that feels like they could actually sail the Grand Line.
Pre-Timeskip vs. Post-Timeskip: Picking Your Era
One of the biggest stylistic choices you'll make is deciding which era of the One Piece art style you want to channel. Oda's art evolved quite a bit over the years, with the two-year timeskip marking a major shift in the look and feel of the characters. You can nudge the AI toward one or the other with some well-placed keywords.
To really nail this down, it helps to see the differences side-by-side.
One Piece Style Guide: Pre-Timeskip vs Post-Timeskip
| Artistic Element | Pre-Timeskip Style (East Blue to Marineford) | Post-Timeskip Style (Return to Sabaody onwards) |
|---|---|---|
| Character Proportions | Rounder faces, softer jawlines, and generally simpler body structures. A more classic, almost cartoonish feel. | Sharper, more angular features. Characters often appear taller, more muscular, with more defined anatomy. |
| Linework | Bolder and simpler lines. Less intricate detail in clothing and hair. | Thinner, more refined linework allowing for greater detail in textures, expressions, and shading. |
| Shading & Color | Flatter, more cell-shaded color palettes with less complex shadows. | More dynamic lighting and complex shading, giving characters more depth and a modern, polished look. |
| Overall Vibe | Nostalgic, adventurous, and slightly more whimsical. Captures the early journey's spirit. | Mature, action-oriented, and "cooler." Reflects the higher stakes and more powerful characters. |
This isn't just trivia—it's actionable info for your prompts.
When you're writing, including phrases like "in the pre-timeskip art style of One Piece" or "emulating the post-timeskip Wano arc style" makes a huge difference. That one little phrase gives the AI a clear reference point, steering it away from a generic anime look and toward something much more specific.
From my own experience, I find myself leaning toward the post-timeskip style for its sharp, dynamic look, especially for action poses. But if I'm creating a character meant to feel a bit younger or more lighthearted, the classic pre-timeskip roundness is perfect. Don't be afraid to try both!
The global love for anime styles like this is no small thing. The Japanese animation industry pulled in an incredible USD 22 billion in revenue during 2023 alone, showing just how much creative and commercial power these unique artistic identities hold.
For a broader look at what makes different anime styles tick, our guide to various anime art styles is a great place to start.
By giving the AI clear, specific instructions about the exact era and key features you're after, you transform your creation from a generic cartoon into a character that genuinely feels like they belong in the One Piece universe.
How to Write the Perfect Pirate Prompt
Your text prompt is the rudder of your ship—it steers the AI exactly where you want it to go. If you just type "make me a pirate," you're going to get a generic, forgettable result almost every time. But a detailed, thoughtfully crafted prompt? That's what turns a simple idea into a masterpiece worthy of its own wanted poster.
Think of yourself as the captain giving orders. The more specific your commands, the better your crew—the AI, in this case—can bring your vision to life. This is where you get to blend stylistic keywords with rich character details to create something truly one-of-a-kind.
The Anatomy of a Powerful Prompt
A great prompt for a One Piece character generator usually mixes a few key ingredients. You don’t need all of them every single time, but combining them gives you an incredible amount of control over the final image.
Here’s a quick breakdown of the core components I always think about:
- Style Descriptors: First, you have to ground the AI in the right universe. I start with phrases like
in the style of Eiichiro Oda,dynamic shonen manga ink lines, or maybe something more specific likeWano arc anime aesthetic. - Character Details: This is the heart and soul of your creation. Get descriptive with their appearance, clothes, and expression. Don't be vague. Instead of "pirate coat," try
wearing a tattered navy captain's coat. Instead of "happy," trywith a confident, toothy smirkormessy, windswept crimson hair. - Action or Pose: Don't just let your character stand there. Give them something to do! A simple pose can inject a ton of personality. Think
brandishing a glowing cutlass,leaning against a ship's mast, orpointing dramatically towards the horizon. - Environmental Context: Where is your character hanging out? Adding a little background detail can elevate the whole piece. A few of my go-tos are
on the deck of a pirate ship at sunset,in a bustling port town, oragainst a backdrop of cherry blossom trees.
My personal strategy is to build prompts like a recipe. I start with the base style, add the main character ingredients, and then sprinkle in action and environmental details for flavor. This structured approach helps ensure I don’t forget a key element.
Real-World Prompt Examples
Let's put this into practice. Say you want to create a mysterious revolutionary character.
Instead of just typing "revolutionary character in One Piece style," try getting more specific:
A mysterious female revolutionary, stern expression, wearing a dark green hooded cloak, long silver hair obscuring one eye, detailed line art in the style of Eiichiro Oda post-timeskip, standing on a rainy cobblestone street.
See the difference? Now, what if you’re trying to make a Wano-themed ronin?
A male ronin with a topknot and a thin scar over his left eyebrow, wearing a faded blue kimono, hand resting on the hilt of his katana, determined gaze, dynamic ink wash style reminiscent of the Wano arc, cherry blossom petals falling around him.
The results are night and day. The second prompt in each example gives the AI clear, actionable instructions, leading to a much richer and more specific character. For more ideas on how to craft unique characters, you might be interested in our guide on the AI anime character generator.
The Power of Negative Prompts
Telling the AI what you want is only half the battle. You also have to tell it what you don't want. That's where negative prompts come in. Think of them as guardrails that help you avoid common AI weirdness like mangled hands, extra limbs, or blurry faces.
Here are a few negative prompts I use all the time:
mutated hands, extra fingers, deformedblurry, grainy, low-qualitywatermark, text, signatureugly, tiling, poorly drawn hands
Using negative prompts cleans up your images a surprising amount and saves you the headache of regenerating over and over. It's a simple step that has a massive impact on the final quality.
This demand for unique characters is a huge reason the anime market is booming. The industry was valued at approximately USD 37.7 billion in 2025 and is projected to hit USD 77.3 billion by 2033. Getting your prompts right means you can create content that really stands out.
Keep Your Character Looking Consistent
Getting that one perfect image from a one piece character generator feels great, but the real treasure is a full set where your character looks the same every single time. Consistency is what makes a character feel real, whether you're a streamer creating emotes, a role-player bringing a pirate OC to life, or just having fun.
Without it, your character can feel like a totally different person in each new picture. Thankfully, what used to be a massive headache is now a pretty straightforward process, thanks to some clever features built into modern AI tools. The goal here is to lock in your character’s identity so you can change their pose, expression, or outfit without losing what makes them them.
Mastering the Seed Number
The simplest and most powerful tool you have for consistency is the seed number. Think of a seed as a unique starting point or a recipe for a specific AI generation. When you get an image you absolutely love, grabbing its seed number is like saving the recipe so you can cook up variations of the same dish.
By using the same seed, you're telling the AI to start from the exact same random noise pattern. This keeps the character's core features—like their facial structure and the overall style—incredibly similar. From there, you can just tweak the prompt to change their expression from a "confident smirk" to an "angry shout." It's a game-changer for creating reaction images or storyboards.
My personal workflow is to find a "golden image"—the one that just nails the character's look. I immediately save that seed number. From then on, it becomes the foundation for every other image, and I only change small parts of the prompt. This one little trick ensures my character always feels like the same person.
Training a Dedicated Character Model
If you're after the absolute best consistency, nothing beats training your own dedicated model. This is where that set of 10-20 high-quality photos we talked about earlier comes back into play. You upload them, and the AI analyzes your features from all sorts of angles and expressions to build a unique profile of your face.
Once the model is trained, you can call on it with pinpoint accuracy.
[Your Character Name], in a dynamic action pose, dodging an attack[Your Character Name], portrait shot, looking surprised[Your Character Name], full-body shot, wearing a Wano-style kimono
This method locks in core features like your hairstyle, eye color, and any signature accessories, giving you total freedom to throw your character into any scenario you can dream up.
This growing demand for personalization is part of a much bigger trend. With internet distribution now the fastest-growing segment of the anime market—exploding at a 21.2% compound annual growth rate—the need for these tools has never been greater. You can dive deeper into this by exploring the anime market analysis.
This digital boom has created a huge appetite for tools that let fans and creators put themselves right into the worlds they love. By getting comfortable with seeds and trained models, you can build a whole library of consistent, high-quality images, ready for any adventure on the Grand Line.
Got Questions About Your One Piece Generator?
Jumping into AI art is a blast, but it's totally normal to have a few questions pop up. Whether you're wondering about the legal side of things or how to nail a specific detail, getting some straight answers makes the whole process smoother. Let's tackle some of the most common questions I hear.
Can I Actually Use These Characters Legally?
This is a big one, and the short answer is: it depends on what you're using it for.
When you generate a character based on your own photo in the style of One Piece, you're creating something new and transformative. For personal stuff—like a new profile picture, a forum signature, or just for fun to share with your friends—you're in the clear. You're just playing with an aesthetic, not claiming you own the One Piece universe.
But if you're thinking about selling merchandise or using the character in any commercial way, things get a bit murky. While an art style itself can't be copyrighted, specific, trademarked elements (like the iconic Straw Hat logo, for instance) absolutely are.
My advice? If you're going commercial, create characters that are inspired by the style, not direct copies. When money is on the line, it's always smartest to chat with a legal pro to be safe.
How Do I Add Specific Details Like a Devil Fruit?
This is where the magic of a good prompt comes in. If you want specific, unique details, you have to tell the AI exactly what you're picturing.
Vague prompts will give you vague, generic results. Don't just say "holding a fruit." Get specific! Try something like, "holding a swirling purple Gum-Gum Fruit with a green stem." See the difference? That same logic works for everything else.
Here are a couple more ideas to get you started:
- For a Custom Pirate Flag: Instead of just "with a flag," describe it. Try, "
standing before a black Jolly Roger with a crescent moon scar over the skull's left eye." - For a Unique Weapon: Don't settle for "holding a sword." Go for, "
brandishing a sleek, single-edged cutlass with a golden hilt."
The more detail you feed the AI, the closer it gets to your vision. It might take a few tries, so don't be afraid to tweak and refine your prompts. That's all part of the fun.
Why Does My Character Look Different in Every Picture?
Ah, the consistency problem. It's a classic challenge in AI art, but it's definitely something you can solve. Nothing breaks the illusion faster than having your character's face change with every new image.
Your best move is to find a platform that lets you train a model on your own photos. Giving it a solid set of 10-20 high-quality pictures of your face from different angles and with different expressions teaches the AI you. This becomes the solid foundation for every image you create later.
Next, once you get a result you absolutely love, look for its "seed" number. Think of a seed as a unique ID for that specific image's creation process. Reusing that seed tells the AI to start from the exact same point, which helps keep the look incredibly stable.
Finally, keep your core character descriptions—hair color, eye shape, key facial features—exactly the same from one prompt to the next. Only change the parts describing the pose, background, or action. Using these tricks together is the key to creating a consistent character you can use across an entire series of images.
Ready to bring your own pirate crew to life with stunning consistency and detail? With Tooncraft, you can train a model on your photos and generate endless adventures in the iconic One Piece style. Start creating your character on tooncraft.ai today and set sail on your Grand Line journey